---
title: Blog - Trusted Team Extension Partner For Europe & USA (10)
description: Empower your business with our expert team augmentation services. Scale efficiently and stay ahead in the ever-evolving tech landscape. (10)
---
[Skip to content](https://www.craftsmensoftware.com/blog/page/10#main)
\[ CLIENT STORY \]
CLOSE ✕
[](https://www.craftsmensoftware.com)
[About us↗](https://www.craftsmensoftware.com/about-us)[Client Stories↗](https://www.craftsmensoftware.com/client-success-stories)[Case Study↗](https://www.craftsmensoftware.com/case-study)[How We Work↗](https://www.craftsmensoftware.com/how-we-work)[Blog↗](https://www.craftsmensoftware.com/blog)[Career↗](https://careers.craftsmensoftware.com/)
[NO](https://www.craftsmensoftware.com/no/)
[Get In Touch↗](https://www.craftsmensoftware.com/contact-us)MENU
[About us↗](https://www.craftsmensoftware.com/about-us)[Client Stories↗](https://www.craftsmensoftware.com/client-success-stories)[Case Study↗](https://www.craftsmensoftware.com/case-study)[How We Work↗](https://www.craftsmensoftware.com/how-we-work)[Blog↗](https://www.craftsmensoftware.com/blog)[Career↗](https://careers.craftsmensoftware.com/)
[NORSK](https://www.craftsmensoftware.com/no/)
[Get In Touch↗](https://www.craftsmensoftware.com/contact-us)
# Insights on Software, Teams*and Technology Growth*
Explore practical perspectives on software delivery, team collaboration, and technology partnerships that help growing businesses make better decisions and build with confidence.
[Discuss Your Needs](https://www.craftsmensoftware.com/contact-us)

Search articles
[All](https://www.craftsmensoftware.com/blog#articles) [Blog](https://www.craftsmensoftware.com/blog/tag/blog#articles)[AWS](https://www.craftsmensoftware.com/blog/tag/aws#articles)[Tech](https://www.craftsmensoftware.com/blog/tag/tech#articles)[Python](https://www.craftsmensoftware.com/blog/tag/python#articles)[Tips and hacks](https://www.craftsmensoftware.com/blog/tag/tips-and-hacks#articles)[lambda](https://www.craftsmensoftware.com/blog/tag/lambda#articles)[Software Team Augmentation](https://www.craftsmensoftware.com/blog/tag/software-team-augmentation#articles)[DynamoDB](https://www.craftsmensoftware.com/blog/tag/dynamodb#articles)[Team Augmentation](https://www.craftsmensoftware.com/blog/tag/team-augmentation#articles)[AI](https://www.craftsmensoftware.com/blog/tag/ai#articles)[Nodejs](https://www.craftsmensoftware.com/blog/tag/nodejs#articles)[serverless](https://www.craftsmensoftware.com/blog/tag/serverless#articles)[React](https://www.craftsmensoftware.com/blog/tag/react#articles)[Flask](https://www.craftsmensoftware.com/blog/tag/flask#articles)[GraphQL](https://www.craftsmensoftware.com/blog/tag/graphql#articles)[FFmpeg](https://www.craftsmensoftware.com/blog/tag/ffmpeg#articles)[Git](https://www.craftsmensoftware.com/blog/tag/git#articles)[GoLang](https://www.craftsmensoftware.com/blog/tag/golang#articles)[SQL](https://www.craftsmensoftware.com/blog/tag/sql#articles)[Transcription](https://www.craftsmensoftware.com/blog/tag/transcription#articles)[Vite](https://www.craftsmensoftware.com/blog/tag/vite#articles)
Newest firstPage 10 of 11
[](https://www.craftsmensoftware.com/blog/configure-serverless-offline-aws-simple-queue-servicesqs-2)
### [Configure Serverless Offline and AWS Simple Queue Service(SQS)](https://www.craftsmensoftware.com/blog/configure-serverless-offline-aws-simple-queue-servicesqs-2)
Introduction The Serverless Framework is a free and open-source web framework written using Node.js \[Wiki\] that helps you develop and deploy AWS infrastructure resources. It’s best known for its development for AWS Lambda functions along with other AWS infrastructure resources it requires. One of the excellent plugins it offers is serverless-offline, which enables you to test your AWS resources directly from your local environment. However, although Serverless Offline is a nice plugin for testing our lambda functions locally, it requires some additional setups for other services. AWS SQS is one of those services and if you attempt to invoke any SQS that is linked to its consumer lambda, it will either directly execute the AWS account’s SQS or fail if the resource is not available. In this blog, let’s explore how we can streamline the process and put AWS SQS to the test. We will discuss how you can run your AWS SQS service with Serverless Offline locally using serverless-offline-sqs and ElasticMQ. Installations and Getting Started Initially, we will need to install serverless-offline-sqs as a dev dependency in your project root. This serverless-offline-sqs plugin emulates SQS queue on your local system, listening to the SQS queue and invoking lambda handlers. Later inside your project’s serverless.yml file add the following entry under plugins and custom custom: The custom’s serverless-offline-sqs is defined so that it can be used with ElasticMQ which is an in-memory message queue system that can be run on your local machine. ElasticMQ Installation To be able to replicate an AWS SQS queue on a local machine, a queue system must be functioning. ElasticMQ is one of the available solutions that is suited for the task. It is a stand-alone in-memory queue system that supports the AWS SQS interface. There are two ways you can install and run ElasticMQ on your local machine. You can either run the jar file with java run time or run elasticmq as a docker container. JAVA For running the jar file you will need to have Java version 8 or above. You can download the elasticmq-server v1.3.9 jar file or download the latest version from ElasticMQ GitHub repository. Run the following command to start the elasticmq server on your local machine and it will bind it to which binds to localhost:9324 / 0.0.0.0:9324 Docker For running as a docker container you will need to have docker installed on your local machine first. After installation, you need to pull the elasticmq-native docker image with the following command. According to their documentation, The docker image is much smaller and starts up much faster, compared to the full JVM version. Now, run the image via docker with the following command and name the container Offline-SQS. (Note that if you have already started the server via jar, you need to close that and release the port, also if you run this command directly, the docker will first pull the image and later run it) After your work is done you need to stop the container, you have to either restart that container you just created or remove it and re-run the above command again. You can combine the start and stop docker commands and add a script to your package.json file. For example: Configurations in Source Code In your source code whenever you publish a message into your SQS, it needs a QueueUrl. Generally, the queue URL looks something like this: Copy https://sqs.{aws-region}.amazonaws.com/{aws-accountId}/{aws-sqsQueueName} https://sqs.{aws-region}.amazonaws.com/{aws-accountId}/{aws-sqsQueueName} Now to send messages to our local SQS we need to convert the URL with the endpoint we bound the server with http://0.0.0.0:9324/{aws-accountId}/{aws-sqsQueueName} We can have a helper method that will convert our SQS queue URL for local. For example: We can choose which URL we want to use based on the event header’s Host property to know if the call was made from a local machine. With the above configuration, we will now be able to send a message to your local SQS server. Clone and run the following GitHub repository to see it in action. https://github.com/sayefreyadh/serverless-offline-sqs-example-typescript Thank you for your time.
**Abdus Sayef Reyadh**25 Aug 2020 Read →
[](https://www.craftsmensoftware.com/blog/an-approach-for-working-with-legacy-api-and-new-api)
### [An approach for working with legacy API and new API](https://www.craftsmensoftware.com/blog/an-approach-for-working-with-legacy-api-and-new-api)
Introduction When we first start working with a third-party API, the version we started with may become obsolete after a few years since the legacy API may no longer be supported by the original creators or contains security problems when we need to migrate to newer versions. There could be a variety of other reasons to upgrade, such as the expense of maintaining the legacy API being greater and inefficient than the latest version, as well as support for new features or support from the original providers. In this article, we will be working on Instagram Private API (legacy API) and Instagram Graph API (new API). The Instagram Graph API, which is a set of Facebook Graph API endpoints that let developers access information from Instagram Professional accounts introduced in January 2021. Before it, one of our team at Craftsmen used to use the Instagram Private API to publish social media content on Instagram. So, before we start, let’s call Instagram Graph API as IG-API and Instagram Private API as IP-API for this entire blog, and let’s first explain why we were encouraged to switch from IP-API to IG-API and address an approach for working with both of them. Reasons for switching to new API A few months after the first initial release of IG-API, we had cases where our client’s Instagram account got temporarily blocked or suspended while using our services. We investigated what might be the prior reason behind it and got multiple open issues in the IP-API GitHub repository. From our research, we came to the conclusion that IP-API seems to work in that it tries to create a device instance and makes Instagram think that the request is coming from an actual physical device. But, if we keep doing it on every post publish, and try to use any kind of web service like AWS Lambda to handle the task. Instagram might get suspicious about the incoming requests as we have no control over the IP of the AWS Lambda which it is triggering from. Think of it in this manner, you might get blocked if you keep changing your IP address using VPN and keep posting images from different regions with different IP addresses, you might get locked out or suspended for security reasons. Our workflow for both legacy and new API We started developing support for IG-API but unfortunately, of all the features which were offered by IP-API only two were offered by the IG-API. So, we have to make the systems work aside from each other in the following manner. While implementing the IG-API, we came across a unique problem, as the new IG-API does not directly support fetching post information that IP-API made. So how did we fix this problem? Let’s start small, first, whenever we publish a post on Instagram using IG-API we get a post id for the post which is later used to fetch information about the post using the graph endpoints. Now, though a similar post id is also expected from the IP-API as well unfortunately it sends us a combination of post ig\_id and account ig\_id connected with an underscore and no post id exists in the IP-API response which is needed to fetch post information with IG-API. We can fetch a user’s list of media post id with ig\_id with IG-API for a specific time range which enables us to narrow down the response. As we keep the logs for each lambda execution’s start and end time for every successful post, we have used it to fetch the list of media post id and ig\_id to later find the exact match for the IP-API created post. Problem solved, yay!! But what if we were not that much lucky? The above solution was possible as we had the necessary information at our disposal but what if we did not have any time logs or IG-API does not support the time-based pagination? An alternative approach So for the not-lucky case, one might suggest, why not do a system-wide database migration with the new IG-API post id. This might be a good idea, but we had to think of our use cases and costs. As we use AWS Dynamodb for our database, scanning and updating the whole database for post information of Instagram Provider seems overkill to solve the problem. Not to mention, it’s expensive and the client does not have any use cases where they regularly need to see the old post information. So, on another approach, we can fetch all the post id with ig\_id using IG-API then make a cross-reference using the IP\_API post id’s post ig\_id and finally migrate the existing database with the new id and send a response. But the latency of the above-mentioned process is going to be high as we are fetching all the post id and ig\_id for each request which is redundant and chances are our AWS lambda might get timed out if the number of posts is too high. Let’s modify the solution a little bit more, we can introduce cache storage that saves the post id and ig\_id while the registration and later find the exact id from there. The cache storage does not need to be synchronized with the updated post ids as the IP-API is now no longer supported. If it is still to be supported then a scheduler needs to be executed at a certain time interval to fetch and store the updated post ids of IG-API. Hope you have enjoyed reading this article. Thank you for your time.
**Abdus Sayef Reyadh**18 Jul 2020 Read →
[](https://www.craftsmensoftware.com/blog/secure-your-graphql-api-with-some-advanced-strategies)
### [Secure your GraphQL API with some advanced strategies](https://www.craftsmensoftware.com/blog/secure-your-graphql-api-with-some-advanced-strategies)
Are you ready to learn how to become a superhero in the world of GraphQL? By giving clients superpowers, GraphQL opens up a world of possibilities, but as Uncle Ben famously said, “with great power comes great responsibility.” In the next few sections, we’ll dive into some strategies that will help you secure your GQL server from any nefarious queries lurking in the shadows. It’s time to don your cape and protect your GraphQL endpoint like the true hero you are! What is GraphQL? GraphQL is a query language for APIs (although often confused with being a database technology) that was developed by Facebook in 2012 and was open-sourced three years later. It is a powerful alternative to REST APIs and enables more efficient and flexible data fetching. In essence, GraphQL is designed to allow clients to specify exactly what data they need and receive only that data in response. This is one of the key advantages of GraphQL which in contrast to traditional REST APIs, where clients often receive more data than they need (Overfetching) and have to make multiple requests to get all the necessary information (Underfetching). Suppose we have a car cyclopedia platform with the following REST API endpoints: Copy GET /cars GET /cars/{id} GET /cars/{id}/parts GET /manufacturers/{id} GET /manufacturers/{id}/cars GET /cars GET /cars/{id} GET /cars/{id}/parts GET /manufacturers/{id} GET /manufacturers/{id}/cars To retrieve a car and its parts, we need to make multiple requests to different endpoints. For example, to retrieve the car with ID#123 and its parts, we would need to make the following requests: With GraphQL, clients can specify the shape of the data they need using a hierarchical structure, which is called a query. Here’s an example of a GraphQL query to retrieve the car with ID 123 and its parts, along with the manufacturers who made the car: Copy query { cars (id: "123") { id model price manufacturers { id name } parts { id model manufacturers { id name } } } } query { cars (id: "123") { id model price manufacturers { id name } parts { id model manufacturers { id name } } } } This query specifies the exact data we want to retrieve and its structure. The response will only include the requested data, which can improve performance and reduce network usage. Additionally, we can retrieve data from multiple resources in a single request, which can simplify our code and reduce the number of API calls we need to make. Seems Great! But why do we need extra security? Already you may have got the idea that GraphQL gives enormous power to clients (It’s Over 9000!!!). Because clients can create extremely complicated queries, our servers need to be ready to handle them. Besides, these requests may be malicious ones coming from bad clients, or they could just be very big ones coming from good clients that could potentially take our GraphQL server down. So, it is our responsibility to impose some strategies to avoid these risks. Timeout Most of the time we just use the simplest one which is a timeout and call it a day. But for GraphQL, setting the optimal timeout is very tough as a legitimate complex query may take more than the time allowed, which may result in strange behaviors. Also, damage can already be done even before the timeout halts the execution. So, what we can do is to use this as a final protection and apply some advanced strategies beforehand. Maximum Query Depth GraphQL provides a strongly typed schema that allows for validation and documentation of the API. As we covered earlier, clients using GraphQL may craft any complex query they want. Since GraphQL schemas are often cyclic graphs, this means a client could craft a query like this one: Copy query IhaveComeToBargain { # depth: 0 bargainer (id: "strange") { # depth: 1 dormammu { # depth: 2 bargainer { # depth: 3 dormammu { # depth: 4 bargainer { # depth: 5 dormammu { # depth: 6 bargainer { # depth: 7 # You cannot do this forever . . . # Actually I (client) can!!! } } } } } } } } query IhaveComeToBargain { # depth: 0 bargainer (id: "strange") { # depth: 1 dormammu { # depth: 2 bargainer { # depth: 3 dormammu { # depth: 4 bargainer { # depth: 5 dormammu { # depth: 6 bargainer { # depth: 7 # You cannot do this forever . . . # Actually I (client) can!!! } } } } } } } } In the above example, the query has a depth of possibly more than 7. If we know our schema well, we can have an idea of how deep a legit query can go and set a Maximum Query Depth threshold for the client. The GraphQL server then can reject or accept a request based on its depth by analyzing the query document’s abstract syntax tree (AST). Query Complexity Sometimes, depth alone cannot force all abusive queries. For example, a query requesting an enormous number of nodes on the root will be very expensive but unlikely to be blocked by a query depth analyzer. Some fields in our schema could be more complex to compute than others. To calculate how complex the query is let us give each field a complexity of 1. Then take a look at this example: Copy query { car (id: "123") { # complexity: 1 manufacturer { # complexity: 1 name # complexity: 1 } } } But what if we wanted more cars produced by the manufacturer of car#123? So, we should consider arguments also when calculating complexity. query { car (id: "123") { # complexity: 1 manufacturer { # complexity: 1 name # complexity: 1 cars (first: 100) { # complexity: 100 model # complexity: 1 } } } } query { car (id: "123") { # complexity: 1 manufacturer { # complexity: 1 name # complexity: 1 } } } But what if we wanted more cars produced by the manufacturer of car#123? So, we should consider arguments also when calculating complexity. query { car (id: "123") { # complexity: 1 manufacturer { # complexity: 1 name # complexity: 1 cars (first: 100) { # complexity: 100 model # complexity: 1 } } } } Throttling The above solutions are great when we want to stop clients who are making large queries. But what if the client is trying to abuse our server with a lot of medium sized queries? In REST APIs, a simple throttle is enough to stop clients from requesting resources too often. In GraphQL just throttling on the number of requests won’t help us. Also, the server has no idea about the number of requests that are acceptable, because that is actually defined by clients. Throttling Based on Server Time We can estimate how expensive a query is based on the server time it needs to execute. Then we can deduce maximum server time a client can use over a certain time delta. After we can decide how much time should be added to a client over time, we can implement the leaky bucket throttling algorithm. Leaky Bucket Suppose we give our maximum server time (Bucket Size) allowed to 2000ms; clients get 200ms of server time per second (Leak rate). If a single query takes 500ms to complete, the client can call this query 2000ms/500ms = 4 times. After that, any more execution would be blocked until more server time is added. After 3 seconds, bucket size will fill up to 600ms and the query can be executed one more time. Throttling Based on Query Complexity Throttling based on time is good because clients can now call complex queries less often as it takes more time to compute and call simple queries more as they take less time to finish. But the problem is we need to inform clients of these constraints so that they can configure themselves accordingly. But server time is not easy to explain to clients as the client doesn’t know how much time a query can take without trying them first, requiring trial and error. Also, the server might have other side effects running which could slow the query execution time. The GitHub public API uses some interesting strategies to throttle their clients. They impose 2 limits (Node limit and Rate limit) to protect their APIs. In Node limit, Node calculations are done exactly the way we saw earlier in the Query Complexity section. In the Rate limit they calculate based on the number of requests a query has to fulfill. But we know a single GraphQL query makes a single request to the server. How does that even work!? Using their strategy in our cars example will make things a bit easier to understand. Copy query { manufacturer (first: 50) { # complexity: 50 name # complexity: 1 cars (first: 100) { # complexity: 100 model # complexity: 1 parts (last: 20) { # complexity: 20 model # complexity: 1 manufacturer (first: 10) { # complexity: 10 model # complexity: 1 } } } } } query { manufacturer (first: 50) { # complexity: 50 name # complexity: 1 cars (first: 100) { # complexity: 100 model # complexity: 1 parts (last: 20) { # complexity: 20 model # complexity: 1 manufacturer (first: 10) { # complexity: 10 model # complexity: 1 } } } } } Here we need to add up the number of requests needed to fulfill each unique connection in the call. We are actually calling it a request each time we want to connect to a unique list to get its items. Each new connection can also have its own point value. This is because you can have multiple systems(database, legacy or third—party systems) behind a single, coherent GraphQL API. So, each connection can have a different load on the server. But for simplicity, we are giving fixed 1 point to each connection here. First, we are getting the first 50 manufacturers from the list. Although the complexity is 50, the API has to connect to the manufacturers list once. So, total requests = 1. Then, we are getting 100 cars made by the manufacturers which we got from each of the 50 manufacturers. So, total requests = 50. Then, we are returning 20 parts from each of the probable 100 cars x 50 manufacturers = 5000 cars. So, total requests = 5000 If we dive more, we are getting 10 manufacturers from each of the potential 5000 cars x 20 parts = 100,000 parts. So, total requests = 100,000 Total = 100,000 + 5000 + 50 + 1 = 105051 As the number can get even bigger in the real world, we can normalize the number by dividing it by 100 to get the final aggregate cost. In our example, we get a final score of around 1051. Then we can set the optimized bucket size and leak rate accordingly and express them to the clients. That’s it! We have discussed some of the approaches to secure our GraphQL server against unexpected queries. You can also use data loaders and implement caching to minimize the number of requests to backing data sources even more. But we need to keep in mind that none of the approaches can solve world hunger alone. So, we should know their limits and decide accordingly.
**Arafat Ibne Yousuf**05 Jan 2020 Read →
[](https://www.craftsmensoftware.com/blog/shielding-your-api-with-custom-authorizers-2)
### [Shielding Your API with Custom Authorizers](https://www.craftsmensoftware.com/blog/shielding-your-api-with-custom-authorizers-2)
Do you feel like a fearless adventurer, braving the treacherous digital landscape in search of the ultimate API Gateway REST API security? Well, you’re not alone! In today’s world, protecting your APIs from unwanted access is crucial, and limiting access to specific IP addresses is a popular and effective approach. But fear not, fellow adventurer, for we have the solution you seek! In this exciting blog post, we’ll show you how to wield the power of TypeScript to create a custom authorizer that will protect your API Gateway REST API like a mighty shield. With this tool in your arsenal, you’ll be able to take control of who has access to your APIs and keep your data safe from prying eyes. So grab your trusty keyboard and join us on this thrilling journey to secure your APIs with confidence! Custom Authorizer API Gateway offers a range of powerful tools for controlling access to your APIs, from IAM roles to Lambda authorizers. But for today’s adventure, we’ll be harnessing the power of custom authorizers to lock down our API Gateway REST API. Custom authorizers are like the gatekeepers of your API, letting in only those who have the proper credentials. As the name suggests, they’re customizable to fit your specific security needs. And in this post, we’ll be using a custom authorizer to restrict access to our API Gateway REST API based on specific IP addresses. With a custom authorizer in place, you’ll have greater control over who can access your API and what they can do with it. So buckle up, fearless adventurer, and let’s dive into the world of custom authorizers and IP filtering! Implementation We’ve covered the theory behind custom authorizers and IP filtering, but now it’s time to roll up our sleeves and dive into the implementation details! In this thrilling chapter of our API security saga, we’ll be using TypeScript to craft a custom authorizer that allows only specific IP addresses to access our API Gateway REST API. This code will be your trusty sword and shield, protecting your API from unauthorized access and keeping your data safe and secure. So grab your favorite code editor and get ready to write some serious code. We’ll guide you step-by-step through the implementation process, and by the end, you’ll have a custom authorizer that’s ready to defend your API against all manner of cyber threats. Let’s go! Copy import { APIGatewayAuthorizerEvent, APIGatewayAuthorizerResult, Context } from 'aws-lambda'; interface PolicyDocumentStatement { Action: string; Effect: string; Resource: string; } interface PolicyDocument { Version: string; Statement: PolicyDocumentStatement\[\]; } interface AuthResponse { principalId: string; policyDocument: PolicyDocument; } export const handler = async (event: APIGatewayAuthorizerEvent, context: Context): Promise =\> { try { const ip\_address = event.headers\['X-Forwarded-For'\]?.split(',')\[0\] || event.requestContext.identity.sourceIp; const allowed\_ips = \['192.168.1.1', '10.0.0.1', 'ADD\_YOUR\_IP\_TO\_TEST' \]; if (!allowed\_ips.includes(ip\_address)) { return generatePolicy('user', 'Deny', event.methodArn); } return generatePolicy('user', 'Allow', event.methodArn); } catch (error) { console.error(error); return generatePolicy('user', 'Deny', event.methodArn); } }; const generatePolicy = (principalId: string, effect: string, resource: string): AuthResponse =\> { const policyDocument: PolicyDocument = { Version: '2012-10-17', Statement: \[ { Action: 'execute-api:Invoke', Effect: effect, Resource: resource, }, \], }; return { principalId, policyDocument, }; }; import { APIGatewayAuthorizerEvent, APIGatewayAuthorizerResult, Context } from 'aws-lambda'; interface PolicyDocumentStatement { Action: string; Effect: string; Resource: string; } interface PolicyDocument { Version: string; Statement: PolicyDocumentStatement\[\]; } interface AuthResponse { principalId: string; policyDocument: PolicyDocument; } export const handler = async (event: APIGatewayAuthorizerEvent, context: Context): Promise =\> { try { const ip\_address = event.headers\['X-Forwarded-For'\]?.split(',')\[0\] || event.requestContext.identity.sourceIp; const allowed\_ips = \['192.168.1.1', '10.0.0.1', 'ADD\_YOUR\_IP\_TO\_TEST' \]; if (!allowed\_ips.includes(ip\_address)) { return generatePolicy('user', 'Deny', event.methodArn); } return generatePolicy('user', 'Allow', event.methodArn); } catch (error) { console.error(error); return generatePolicy('user', 'Deny', event.methodArn); } }; const generatePolicy = (principalId: string, effect: string, resource: string): AuthResponse =\> { const policyDocument: PolicyDocument = { Version: '2012-10-17', Statement: \[ { Action: 'execute-api:Invoke', Effect: effect, Resource: resource, }, \], }; return { principalId, policyDocument, }; }; Let’s go through this code in more detail. IP Address Validation First, we extract the IP address of the caller from the incoming event: Copy const ip\_address = event.headers\['X-Forwarded-For'\]?.split(',')\[0\] || event.requestContext.identity.sourceIp; const ip\_address = event.headers\['X-Forwarded-For'\]?.split(',')\[0\] || event.requestContext.identity.sourceIp; Note that we are using the X-Forwarded-For header to obtain the IP address of the user, but we are also checking the sourceIp field as a fallback. This is because when a user accesses your API Gateway REST API, their IP address is typically hidden behind a load balancer or proxy. The \`X-Forwarded-For\` header contains the user’s original IP address. We use optional chaining (?.) to ensure that the X-Forwarded-For header exists and split it to obtain the user’s IP address. If the header does not exist, we use the sourceIp field as a fallback. Next, we define an array of allowed IP addresses. We then check whether the IP address of the caller is in the list of allowed IP addresses: Copy const allowed\_ips = \['192.168.1.1', '10.0.0.1', 'ADD\_YOUR\_IP\_TO\_TEST' \] if (!allowed\_ips.includes(ip\_address)) { return generatePolicy('user', 'Deny', event.methodArn); } const allowed\_ips = \['192.168.1.1', '10.0.0.1', 'ADD\_YOUR\_IP\_TO\_TEST' \] if (!allowed\_ips.includes(ip\_address)) { return generatePolicy('user', 'Deny', event.methodArn); } If the IP address of the caller is not on the list of allowed IP addresses, we return a policy that will deny the request. Authorization Policy If the IP address of the caller is in the list of allowed IP addresses, we generate an authorization policy document that allows access to the API: Copy return generatePolicy('user', 'Allow', event.methodArn); The generatePolicy function generates an authorization policy document that allows access to the API: const generatePolicy = (principalId: string, effect: string, resource: string): AuthResponse =\> { const policyDocument: PolicyDocument = { Version: '2012-10-17', Statement: \[ { Action: 'execute-api:Invoke', Effect: effect, Resource: resource, }, \], }; return { principalId, policyDocument, }; }; return generatePolicy('user', 'Allow', event.methodArn); The generatePolicy function generates an authorization policy document that allows access to the API: const generatePolicy = (principalId: string, effect: string, resource: string): AuthResponse =\> { const policyDocument: PolicyDocument = { Version: '2012-10-17', Statement: \[ { Action: 'execute-api:Invoke', Effect: effect, Resource: resource, }, \], }; return { principalId, policyDocument, }; }; Testing Now that you’ve braved the digital jungle and deployed your mighty custom authorizer to defend your API Gateway, it’s time to put it to the test! Will it stand strong against unauthorized access attempts? Let’s find out. One way to test your custom authorizer is by making a request to your API Gateway REST API with an IP address that’s not on the list of allowed IPs. Imagine yourself as a daring hacker, attempting to breach your API Gateway defenses. But wait! Your custom authorizer is ready for the challenge and will respond with a bold 403 Forbidden message, sending the intruder running for cover. But why stop there? With the power of the API Gateway console, you can test your custom authorizer even further. Navigate to your API Gateway API, select Authorizers from the sidebar, and behold the Test button next to your custom authorizer. With a click of a button, you can unleash a test event and witness your custom authorizer’s fierce response. So go forth, brave defender of the API realm, and rest easy knowing your API Gateway is guarded by a custom authorizer that’s battle-tested and ready for anything. Conclusion Congratulations, intrepid explorer, you’ve successfully navigated the treacherous waters of API security and emerged victorious! By implementing a custom authorizer to restrict access to your API Gateway REST API, you’ve fortified your defenses and put the bad actors on notice. But let’s not get complacent, bold adventurer. While IP address filtering is a formidable weapon in your security arsenal, it’s not invincible. The digital landscape is full of pitfalls and perils, and attackers are always on the lookout for vulnerabilities to exploit. So keep your wits about you, fearless defender of the API realm. Stay vigilant, stay informed, and keep honing your security skills. With the right tools and mindset, you can create a fortress that even the most determined attackers will struggle to breach. Now go forth, brave warrior, and continue your quest for API security glory!
**Craftsmen Research Team**05 Jan 2020 Read →
[](https://www.craftsmensoftware.com/blog/aws-api-gateway-caching-boost-your-api-speed-3)
### [AWS API Gateway Caching: Boost Your API Speed!](https://www.craftsmensoftware.com/blog/aws-api-gateway-caching-boost-your-api-speed-3)
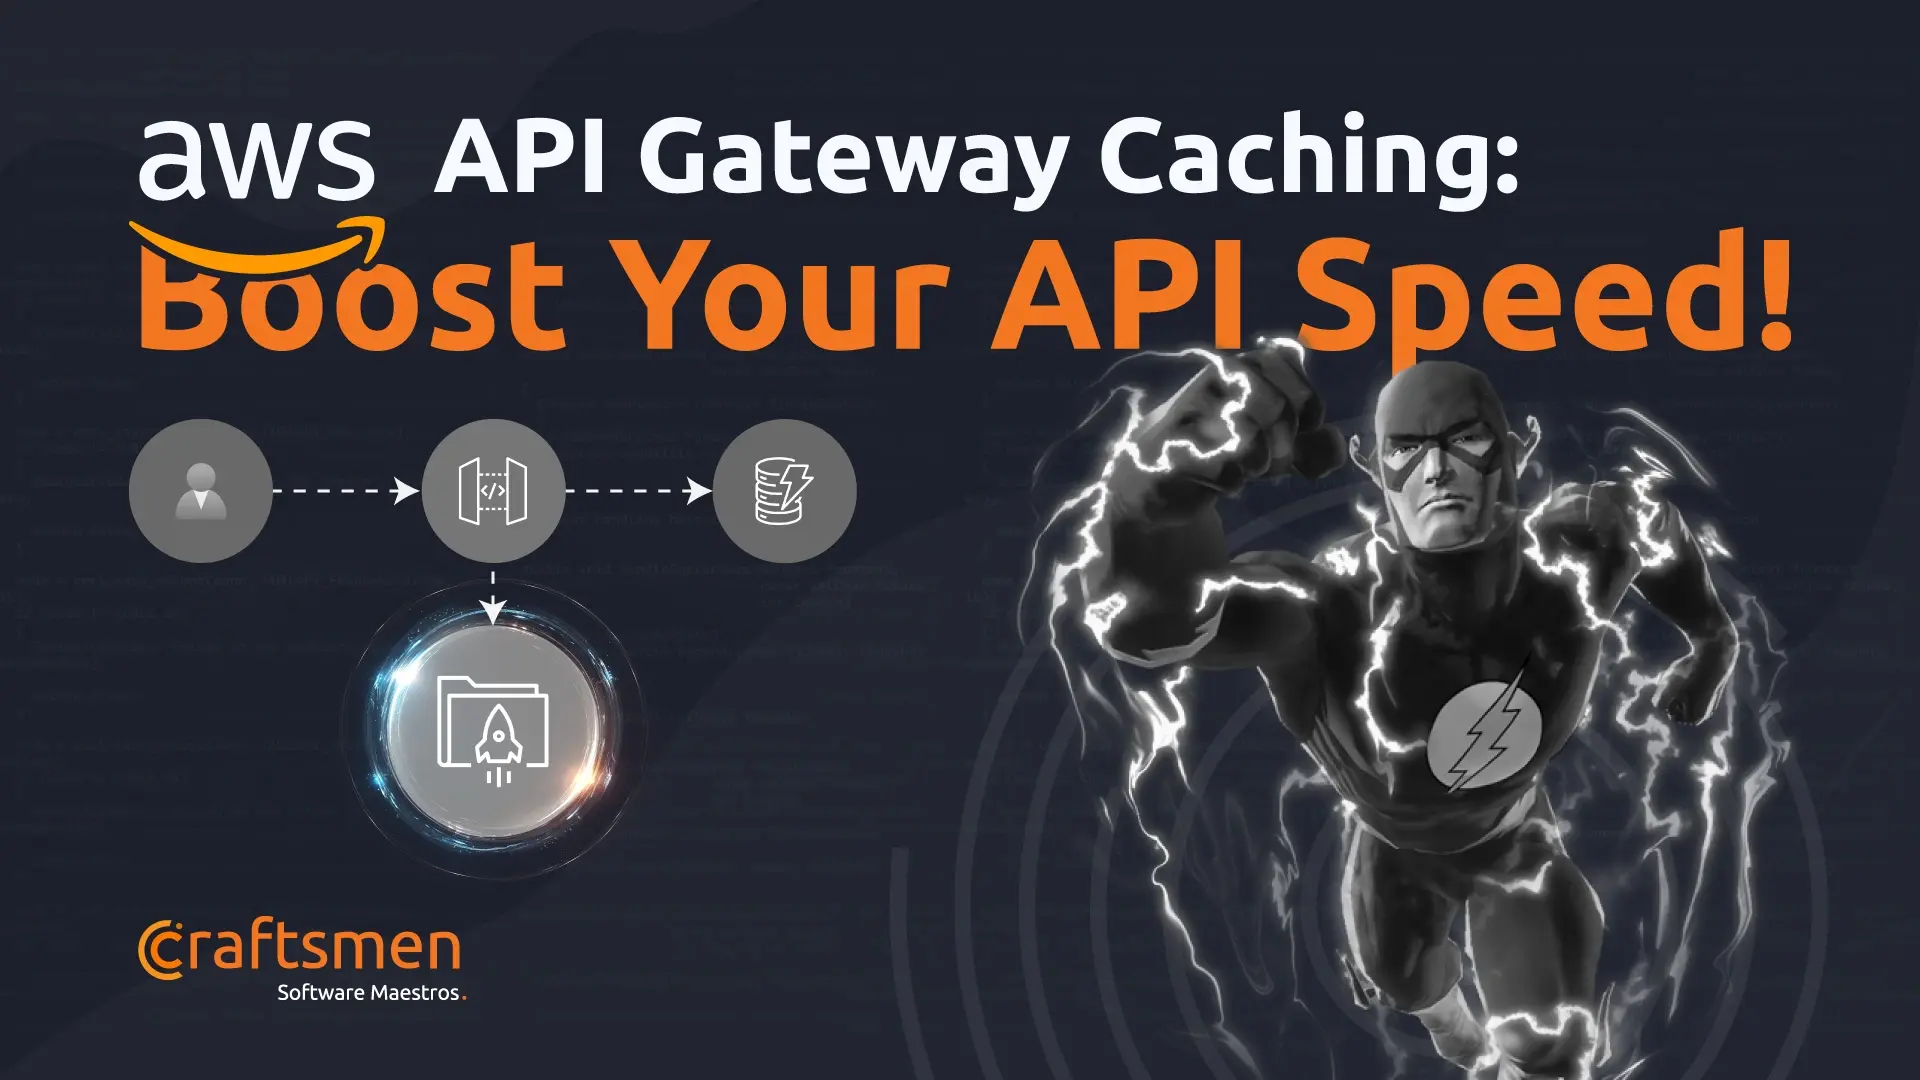
Ready to blast your API to the next dimension? Sick of slow response times and grumpy users? It’s time to explore the electrifying universe of AWS API Gateway caching! In this post, we’ll take you on a thrilling journey to optimize your API performance with AWS Gateway caching. We’ve got all the code snippets and emojis you need to make this the ride of a lifetime. So strap in and get ready to launch into API greatness! What is AWS API Gateway Caching? AWS Gateway caching is a feature that allows you to cache the responses of your API Gateway endpoint in the AWS-managed cache. By caching API responses, the API Gateway can serve subsequent requests from the cache instead of invoking the backend Lambda function. This can lead to significantly faster response times and improved API performance. Using AWS Gateway caching comes with several benefits, such as improved response times, fewer Lambda invocations, scalability, and customization. By caching responses in the AWS-managed cache, you can handle a greater number of requests without invoking the backend Lambda function, which reduces costs and enhances scalability. Techniques for Optimizing AWS Gateway Caching Now that we know what AWS Gateway caching is and why it’s important, let’s dive into some techniques for optimizing its performance. Use Cache Keys Effectively The cache key is used to identify the cached response for a specific request. By choosing cache key parameters that are unique and specific to each request, you can ensure that the cache is used effectively. Here’s an example of how to set the cache key using the AWS SDK for Python: Copy import boto3 client = boto3.client('apigateway') response = client.update\_integration( restApiId='your\_rest\_api\_id', resourceId='your\_resource\_id', httpMethod='your\_http\_method', patchOperations=\[ { 'op': 'replace', 'path': '/caching/parameters/0/name', 'value': 'user\_id' }, { 'op': 'replace', 'path': '/caching/parameters/0/location', 'value': 'querystring' } \] ) import boto3 client = boto3.client('apigateway') response = client.update\_integration( restApiId='your\_rest\_api\_id', resourceId='your\_resource\_id', httpMethod='your\_http\_method', patchOperations=\[ { 'op': 'replace', 'path': '/caching/parameters/0/name', 'value': 'user\_id' }, { 'op': 'replace', 'path': '/caching/parameters/0/location', 'value': 'querystring' } \] ) Here, we’re setting the cache key to use the \`user\_id\` query string parameter. Configure the Cache Time-to-Live (TTL) The TTL for the cached responses specifies how long the responses should be cached. By setting the TTL to an appropriate value, you can balance the performance benefits of caching with the need to serve fresh data. Here’s an example of how to set the TTL using the AWS SDK for Python: Copy import boto3 client = boto3.client('apigateway') response = client.update\_integration( restApiId='your\_rest\_api\_id', resourceId='your\_resource\_id', httpMethod='your\_http\_method', patchOperations=\[ { 'op': 'replace', 'path': '/caching/ttlInSeconds', 'value': '300' # Set TTL to 5 minutes } \] ) import boto3 client = boto3.client('apigateway') response = client.update\_integration( restApiId='your\_rest\_api\_id', resourceId='your\_resource\_id', httpMethod='your\_http\_method', patchOperations=\[ { 'op': 'replace', 'path': '/caching/ttlInSeconds', 'value': '300' # Set TTL to 5 minutes } \] ) In this example, we’re setting the TTL to 5 minutes. Monitor Cache Behavior It’s important to monitor the cache behavior to ensure that it’s working as expected. By reviewing the cache hit and miss rates, you can identify any issues and adjust the caching settings as necessary. Here’s an example of how to view the cache behavior using the AWS Management Console: Open the AWS Management Console and navigate to the API Gateway service. Select your API from the list of available APIs. Click on the “Stages” tab and select the appropriate stage. Click on the “Logs/Tracing” tab and select “Enable CloudWatch Logs”. Click on the “Metrics” tab and select “CacheHitCount” and “CacheMissCount”. Review the cache hit and miss rates to determine if the caching is working as expected. Adjust the caching settings as necessary. Use Invalidations for Dynamic Data If your API serves dynamic data that changes frequently, you can use invalidations to remove stale data from the cache. Here’s an example of how to use invalidations using the AWS SDK for Python: In the above code snippet, we’re invalidating the cache for the \`/your\_path\` resource. Conclusion Congratulations, you’ve made it to the end of this adventure! By using AWS Gateway caching, you can significantly improve the performance of your API and provide a better experience for your users. We hope this guide has helped you on your journey to API optimization. Remember to use cache keys effectively, configure the TTL appropriately, monitor the cache behavior, and use invalidations for dynamic data. With these techniques in your arsenal, you’ll be unstoppable! At Craftsmen, we heavily use a vast majority of services provided by AWS, and we believe that sharing our knowledge and experience can help the wider developer community improve their API performance. So go forth and try out AWS Gateway caching on your own APIs – your users will thank you!
**Craftsmen Research Team**01 Jan 2020 Read →
[](https://www.craftsmensoftware.com/blog/threads-read-it)
### [Understanding Threads and Asynchronous I/O in Programming](https://www.craftsmensoftware.com/blog/threads-read-it)
You might have heard from your senior developers the following: Use threads for I/O stuff, it will be faster Some seasoned dev that you love And yes they are absolutely right and you might have heard the following as well! Nodejs is a single threaded, non blocking event driven, I/O optimised javascript runtime Someone from the internet Or something like this about Python – GIL in python makes threads very inefficient Fact And you’re like… This article will dump everything that we know about threads for you to get started. So buckle up and get ready to level up in the art of fast performance? In the computing world; a thread is the smallest unit of execution that can be managed by whatever operating system you’re running on. Your CPU likes to keep moving with different kinds of tasks that you’ve asked for it to do like make a network request, open a file, read a file, write something, check if the network request is back and so on and you obviously don’t like waiting. So your CPU takes turns doing all these operations. It makes that request that you’ve asked for from reddit, it doesn’t just keep waiting for the result to come back; it opens the file that you’ve asked for and checks back to see if the reddit page is ready or not and so on and so forth. If you consider yourself to be a visual learner, here’s the simplest form of a diagram to explain threads. Before you understand this, let’s do a quick fact check: Anything that you do in your computer must belong to a process A process must have at-least one thread A process can have as many threads as it is allowed by the operating system Now, you’re running a program that reads a file from disk and writes random data to another file at the same time and these have no co-relation to each other. Your process; considering that it is not utilizing multiprocessing; will in reality do a single task at a time and switch as it deems efficient. It would read a few bytes from the disk then write some bytes and then get back to reading and this keeps happening until the execution stops. So why are threads good for I/O tasks? Well, when you’re making a network request, you are essentially waiting for the response to come back, you could be doing other things while you wait, and that’s where threads come into play. You can utilize threads to make multiple requests and wait for the responses alternately, you could open multiple files concurrently, the limits are endless until you see the caveats. Okay, let’s see why we need to be careful about threads when using them and how python GIL is both a blessing and a curse at the same time. Because to me, this helps a lot in understanding how threads behave in a real-life example. You have a global variable, you want to have two threads that add ‘n’ numbers to the global variable one by one. Let’s look at some C++ code: What is the answer to X? Make a guess, we will wait. We will compile and execute this and show you the answer. I bet you did not expect such randomness in our simple code. The issue here is that these threads are running pretty much independently; when thread 1 is reading a value-adding one to it and putting it back, thread 2 is doing the same at the same time and thus both threads end up with different versions of the value of the same memory location and both are rewriting it and this cycle continues and the actual number never gets read by any of these threads. Now the same code but in Python. In python, the result is always the same and this is where the infamous GIL comes to play. GIL or global interpreter lock never lets two threads run at the same time meaning thread 1 runs only when thread 2 finishes and vice versa so they never end up with incorrect values and it works as expected. So we understand what threads are, we know how different languages deal with threads and the caveats of using threads. You probably want to evolve as a developer and use something thats a bit lighter on the os and a little less obtrusive to use. You probably want to know how Nodejs deals with so much whilst running on a single thread. Its auto-magic really. Dorjoy Chowdhury will take over from here to take you scuba diving into the world of “asynchronicity“. Asynchronous-city in Nodejs Nodejs is single-threaded, at the same time it’s asynchronous and it also spawns default 4 threads which it uses for some stuff when needed. You can also spawn worker\_threads yourself if needed of course. So, how does nodejs actually do I/O asynchronously and why does it need the 4 default threads for? The ride will be a little bumpy from now on and you might be overwhelmed, we urge you to hang tight. Let’s start off with some UNIX(or Linux) terminologies. Unix tries to give us the abstraction of different “types” of I/O through file descriptors (which is just a 32-bit integer to a “process”). For example, a socket, a pipe, a FIFO, a terminal, or a regular file when “opened” returns us the file descriptor so that we can do I/O on that file descriptor. In fact, if you ever want to check what kind of file descriptor your process has, just do a cd on your process id in /proc//fd and you will see a ton of file descriptors that have been created. For these different types of files, we only need to use the same read() or write() system calls provided by the kernel which is “blocking calls” by default if you don’t explicitly add the O\_NONBLOCK flag during the open() system call. Something like: If we want to monitor large numbers of file descriptors to see if we can read from or write to those files, we can basically open the files/fd (for network I/O, file means socket basically) using the O\_NONBLOCK flag and write a loop to read or write from those file descriptors continuously. But if the operations that we want to do, i.e. read and write; are likely to block the main execution, the kernel will not initiate a block, instead, it would throw the EAGAIN error and expect you to try again. Doing so means that we will keep iterating and keep trying to execute blocking operations and keep failing, kind of a conundrum aye!. The kernel will not able to anticipate that and not be able to schedule it off properly and it needs to do that because the kernel typically prefers to schedule blocking calls off until they become active again. Essentially we are wasting cpu execution time. This is turning out to be the infinite hotel paradox problem. What if we turn the problem onto itself. We can leave the work for handling asynchronicity for all these files to the kernel (assuming the relevant os provides us with such APIs) and we don’t need to write separate threads for isolated I/O we do in our programs to gain performance. Unix provides multiple APIs which basically monitor given file descriptors and let us know when I/O is possible on any or some or all of these file descriptors. So, the basic idea is, use os provided APIs to handle I/O and when we see that I/O is possible, we do the rest of the execution (running the relevant callback, i.e. running your javascript code that does something with that I/O result like parse JSON or something). Unix provides select(), poll(), epoll() (epoll is linux specific, kqueue on mac, something in windows) as APIs (these APIs are what provide the non-blocking I/O behavior of programs, i.e. in Nodejs) for monitoring large numbers of file descriptors. Nodejs uses libuv (which is multi-platform) for implementing event loop (doing things asynchronously) and it uses epoll(). Select and poll are limited (older implementations of epoll) because of their implementation and they don’t scale well (for example, select limits the number of file descriptors to watch to 1024) and are not fast enough but epoll is both fast and scales well. Nginx also uses single-threaded non-blocking I/O using epoll. Apache uses one thread per client with blocking I/O. Let’s try to emulate what nodejs/libuv tries to do in its bare metal form with some C. Go ahead and execute that. Do keep in mind that this is Linux only and will not work on Free-Bsd based system like Mac-os. Here, from the same directory, on one terminal I first create a FIFO using the mkfifo command. Then I run the example program with the name of the FIFO that I just created. After the program starts, on the other terminal, I just write to the FIFO (using echo and ls) and we see the output in the other terminal. You can do this for sockets or pipes, any number of sockets or pipes or fifos or other epollable files! You can basically add “epollable” file descriptors using the epoll\_ctl() as many as you want and if there are any file descriptors that are ready for I/O according to which flag you used to add the file descriptor to epoll (EPOLLIN, EPOLLOUT), you will get the file descriptors list in the events array if epoll\_wait() returns. You can use sockets, fifo, pipes to monitor using epoll except for regular files(the ones that you read from disk or write to disk). You will get an EPERM error when you do epoll\_ctl() on a regular file descriptor. This kind of makes sense, because sockets or pipes are such that one process reads from it and another one writes to it. But regular files are a bit different in the sense that they are always ready for reading or writing. Regular files don’t block in the sense that one process has not yet written to the file so our read is blocking because there’s nothing to read. (technically, you could “block” read for a regular file by creating a “mandatory lock” on the bytes you are trying to read from the file). But this doesn’t mean that reading or writing to a file is not time consuming(slow disk). So, it would not make sense to read or write to a regular file in the main thread. So, how could this also be done in some kind of asynchronous way? Well, there is a Unix trick where you create a pipe in the main thread and you add the read end of the pipe in epoll. Then, you create a thread where you actually read from the file and the bytes you read, you write to the write end of the pipe from the thread. Now, because the read end of the pipe was added in the epoll instance, the epoll\_wait() will return when the read end of the pipe becomes readable. Remember, nodejs has 4 default threads? This is one use case where nodejs uses threads for. Some other use cases are, for dns resolving (os doesn’t provide asynchronous way to resolve dns so nodejs uses a thread for it) or doing compute heavy things like the crypto module from nodejs etc. The reason for using threads for some cases is obviously to not block the main thread for any indefinite amount of time of course. So basically, the way nodejs gives us an asynchronous way of doing things is by just using the asynchronous api provided by the os in a smart way so that the main thread doesn’t block itself and we don’t need to use threads ourselves. Nodejs prefers using the epoll mechanism instead of threads but if you need to, for some weird reason (we don’t judge) you can use worker\_threads too. The issue with everything that we’ve tried to discuss until now is that its not available as a single source of truth, so take everything with a tiny grain of salt. Have fun, learn to grow, grow to learn.
**Sakib Alam**12 Jul 2019 Read →
[](https://www.craftsmensoftware.com/blog/streaming-with-aws-media-services)
### [Streaming with AWS Media Services - Best Software Development Team Extension Partner for Nordics](https://www.craftsmensoftware.com/blog/streaming-with-aws-media-services)
Have you ever been curious about the inner workings of video streaming and how you can leverage AWS media services to create one. A stream of your own? Lets create a video stream from a local machine to understand the process and how to use AWS Media Services for video streaming. This article will explain how to create a video stream using AWS Media services. Tools we will be using: FFmpeg AWS MediaConnect AWS MediaLive AWS S3 What we need: A machine to run FFmpeg A video file VLC Media player (or any network streaming tool) 4. Video Streaming Overview In this article we will be using a downloaded video file but you can also use any live camera feed directly into stream to show live feeds. Let’s Start! STEP 1 Go to AWS Elemental MediaConnect in console and create a new MediaConnect flow with below settings- AWS MediaConnect Source Detail Here we are using 0.0.0.0/0 (this is not recommended; you should always use your public ip/range) CIDR block to make the flow publicly accessible for this article. We are using SRT Listener. To know more about SRT click here. We will be using inbound port 5555 to connect to this flow. After creating start the flow. A MediaConnect Flow with IP: 52.18.155.2 and Port: 5555 STEP 2 Now, Before Creating a MediaLive channel we need to create an IAM role and MediaLive input. Create an IAM role with S3, MediaLive and MediaConnect full access (this just simplifies the role hunting). IAM role policies IAM Role Trust relationships STEP 3 Create an s3 bucket (ex. my-bucket) and give public access to it so that we can use it publicly. STEP 4 Now Go to MediaLive Inputs and create a new input with settings below: MediaLive Input Settings We have selected input type MediaConnect and added our MediaConnect Flow and the IAM role in this MediaLive input. STEP 5 After creating MediaLive input we will create a MediaLive channel. Attaching the input we have created earlier and the IAM role. MediaLive Channel Setting For this demo we will be using SINGLE\_PIPELINE. MediaLive Channel Setting Now add Output groups MediaLive Channel Output Group Setting We have selected HLS output. As destination url we have used our newly created s3 bucket and we want our MediaLive output file named as index. MediaLive Channel Output Setting Now if we go to our MediaConnect and check output we will find a MediaLive output connected to our flow. MediaConnect Output STEP 6 We need a sample video file we want to use and download FFmpeg on our local machine. To download FFmpeg: wget https://johnvansickle.com/ffmpeg/builds/ffmpeg-git-amd64-static.tar.xz Unzip the FFmpeg folder and use command ./ffmpeg -stream\_loop -1 -i -f mpegts srt://: in terminal. Example: ./ffmpeg -stream\_loop -1 -i /home/user/Downloads/test\_video\_file.mp4 -f mpegts srt://52.18.155.2:5555 We are using -stream\_loop cause our sample video file too short so we are looping our file for continuous stream and since we declared SRT listener in MediaConnect we are using srt://52.18.155.2:5555 After running FFmpeg command in terminal Note: Make sure you have started MediConnect and MediaLive and both are running. We will see something like this in MediaConnect In MediaLive And in s3 bucket We will see an index.m3u8 file, it’s a playlist file generated by Medialive in our s3 bucket. Now if we copy the object url of this m3u8 file and start a network stream in our VLC player. TADAAAAAAAAA……… Thank you for reading! Let’s show you a fun trick by adding a logo in live streaming- Upload a logo in the bucket and copy the object url then follow the steps. Got to MediaLive channel and select schedule Select settings below, add the logo url and create MediaLive Schedule Settings Here we go! Video Streaming with Logo. Special Thanks to Sakibul Alam for contributing and sharing AWS Media Service related knowledge.
**Israjur Rahman**22 Feb 2019 Read →
[](https://www.craftsmensoftware.com/blog/python-ing-it-better)
### [Python-ing it better](https://www.craftsmensoftware.com/blog/python-ing-it-better)
Where I work; we are obsessed with python, we use it everyday and to us python is an art. Python does not force rules unto you. But there’s always a better way of doing it; to us, a pythonic way. This article will try to show off some cool tricks and good practices in python that you can use to level up in the art of python. Using built in functions Most of us start our coding career with C/C++. Which is great and all but it drills in a certain way of doing things that we carry with us throughout the year and that is “assign then modify”. Lets talk code We declare an empty vector and then loop over it to populate. There’s nothing wrong with it and it works absolutely OKAY. Lets convert this to python Nothing wrong here either. But… There’s gotta be a better, more pythonic way of doing this Wow. The map function can call a given function for every element of a given iteratables. We can use this for loads of stuff like- Cool right? Say we need to get all the elements with session=True. Let’s do it the boring way first! Looks OKAY, gets the job done but ew, we need a pythonic way. Here’s one: Wow. What if you only need the first match? Don’t you worry, don’t you worry child, python’s got a plan for you! Python has a plethora of built in functions that you can use to write clean self-explained code. Please use them and LEVEL UP. Comprehending Comprehensions Python is an art. There are a number of ways to do what you need to do. You’re the painter, python is the brush. Move it the way you want. Comprehensions are one off lines in python that can do many things in a more clear, comprehensible, concise way. Let’s get back to the first example from the previous section. How can we achieve the same thing with comprehension? Let’s talk code! It can’t get any prettier than this ladies and gentlemen. This is the beauty of python. You can use list comprehensions with almost every data type. Need a dictionary? Well… Talk about beauty. And you can do this with generators as well! And with sets too! Impressed? You should be. Needle in the thread Have you ever had to make a bunch of API calls and ended up doing it like this- OKAY. But unfortunately I don’t have a tree full of time to wait for these to come in one by one. So let’s clear this up. This is my reaction after seeing this But I still don’t have time. Can you speed it up? I mean I hope this was able to demonstrate the beauty of python and how you can LEVEL UP as a developer. There are some caveats and gotchas when it comes to shortening codes so remember to use them wisely.
**Sakib Alam**11 Jan 2019 Read →
[](https://www.craftsmensoftware.com/blog/migrating-your-create-react-app-project-to-vite)
### [Migrating your Create React App project to Vite](https://www.craftsmensoftware.com/blog/migrating-your-create-react-app-project-to-vite)
In one of my previous articles, I have discussed why Vite is faster and how you can start a new project with Vite. Today I will be focusing on how you can migrate your existing react project created with create-react-app. If you already have an existing react project, then it is a bit complicated process to move to Vite. Don’t get confused with the steps necessary. I will try my best to describe the steps one by one. First of all, delete the node\_modules folder of your project because we will be configuring the package.json file for Vite. Mandatory Steps The first step is to remove all the react-script dependencies from the package.json file and add vite. Note that, the version of the packages may change with time. It is recommended to always use the latest version. Run npm install or yarn. Replace scripts in package.json. Move public/index.html to index.html (project root folder). This is necessary. Otherwise, Vite will not work. Now we need to edit the index.html file and make some modifications there. First of all, remove all the %PUBLIC\_URL% from index.html: Add entry point in index.html: If you are using typescript, then use your typescript entry point (i.e. /src/index.tsx). Next step to create a vite.config.js or vite.config.ts file at the root of your project. The file should look like this: Go to your src folder, create a new file vite-env.d.ts and add this line to the file: /// (You have to add ///) If your project is small enough, there is a possibility that these are the only steps that you need to follow. But there are more things to be configured for big projects. Handling environment variables Let’s assume this is your .env file: In vite, by default, all the environment variables start with VITE\_. So all the environment variables that start with REACT\_APP\_ are needed to be replaced with VITE\_. This means you might need to change all your environment variables which may be a bit painful. This is where another plugin comes into play called vite-plugin-env-compatible. Run the command npm i vite-plugin-env-compatible or yarn add vite-plugin-env-compatible. Then add the following to your vite.config.js or vite.config.ts file. The envPrefix tells vite what should be the staring of every env variable. Thus you don’t need to change any of the env variable name. But you have to do one thing for sure. Wherever you used process.env, you have to change it to import.meta.env. This can be easily done by searching in the vscode and replacing it. Additional Configuration If you are using typescript, then you definitely have one tsconfig file where you might have configured your path aliases. In vite, in order for tsconfig paths to work, you need to install vite-tsconfig-paths using npm or yarn. Then you have to add this plugin to your vite config file. There is a possibility that you may use aws-amplify package in your project in order to use cognito authentication. This may not work out of the box. You have to edit the vite config file and add one extra line for aws-amplify to work. This './runtimeConfig': './runtimeConfig.browser' will make sure that aws-amplify is running smoothly in your project. Sometimes you may use one or more package that uses Node.js built-in and globals. In vite, build in and globals will not work out of the box. You have to do some configuration in vite config file as well as in the index.html file. Let’s first configure it in vite config file. First you have to install @esbuild-plugins/node-globals-polyfill plugin using npm or yarn. Then add this to the vite config file. Then add the following lines into your index.html file inside the script tag. These two steps will make sure that global works anywhere in your project. Lastly, there is possibility that you are using svg files in your project. And in react you can import svg files as react component by using import {ReactComponent as logo} from 'your-svg-path'. This will throw an error in vite. To fix this you have to install vite-plugin-svgr using npm or yarn then add it to your vite config file. Then you have to go to your src folder, and edit vite-env.d.ts file and add another line: /// (You have to add ///). After that import {ReactComponent as logo} from 'your-svg-path' this import will work perfectly fine. This is how you can move to Vite in your existing project. The process might take a bit long time and some digging, but once you have moved to vite, you will be saving a lot of times every time you run your dev server and build files for your production server. Here is a comparison of mine how fast I got using Vite: Dev server in create react app Dev server in Vite 53 seconds 7 seconds You can easily see how much faster I got when I switched to vite. I hope this article might help you to migrate to Vite as well.
**Abul Hasnat**06 Dec 2018 Read →
[←](https://www.craftsmensoftware.com/blog/page/9#articles) [1](https://www.craftsmensoftware.com/blog/#articles) … [9](https://www.craftsmensoftware.com/blog/page/9#articles)
10
[11](https://www.craftsmensoftware.com/blog/page/11#articles) [→](https://www.craftsmensoftware.com/blog/page/11#articles)
## Looking for A Trusted AI-native Partner?
Our engineers work inside your product team, bringing broadcast experience and AI-native workflows. Let’s talk about your platform, your roadmap and where you need support.
[Book a Strategy Call →](https://www.craftsmensoftware.com/contact-us)
[ Book Free 1:1 with Mahmudul Haque Azad CEO & Janitor, Craftsmen](https://www.craftsmensoftware.com/contact-us)

Book Free 1:1 with Mahmudul Haque Azad
CEO & Janitor, Craftsmen
Loading calendar…
### ABOUT CRAFTSMEN
[The Team](https://www.craftsmensoftware.com/about-us)[Our Partnership Model](https://www.craftsmensoftware.com/how-we-work)[Client Stories](https://www.craftsmensoftware.com/client-success-stories)[Career](https://careers.craftsmensoftware.com/)[FAQ](https://www.craftsmensoftware.com/faq)[Privacy Policy](https://www.craftsmensoftware.com/privacy-policy)
### HEADQUARTERS
Craftsmen UK
One Sovereign Quay, Bridge End, Leeds, West Yorkshire LS1 4AG, United Kingdom
### OPERATIONAL HUB
Craftsmen Bangladesh
Plot # 316, Lane # 4, DOHS Baridhara, Dhaka 1206, Bangladesh
### SALES & PARTNERSHIP
Craftsmen Norway
Kong Oscars gate 66, 68, 5017 Bergen, Norway
Craftsmen France
6 Avenue Pierre Grenier, 92100 Boulogne-Billancourt, Paris, France
### A TEAM YOU CAN TRUST
[](https://www.craftsmensoftware.com/trust-centre)[](https://www.craftsmensoftware.com/trust-centre)[](https://www.craftsmensoftware.com/trust-centre)
[](https://www.glassdoor.com/Overview/Working-at-Craftsmen-EI_IE3004266.11,20.htm)[](https://www.craftsmensoftware.com/blog/craftsmen-thrives-at-goodfirms-by-offering-scalable-robust-software-solutions-developed-with-quality-by-maestros)
© 2026 Craftsmen. All rights reserved.
```json
{
"@context" : "https://schema.org",
"@id" : "https://www.craftsmensoftware.com/#organization",
"@type" : "Organization",
"address" : {
"@type" : "PostalAddress",
"addressCountry" : "GB",
"addressLocality" : "Leeds",
"addressRegion" : "West Yorkshire",
"postalCode" : "LS1 4AG",
"streetAddress" : "One Sovereign Quay, Bridge End"
},
"alternateName" : "Craftsmen Software",
"areaServed" : [ "Norway", "Sweden", "United Kingdom", "Germany", "Spain", "United States" ],
"contactPoint" : {
"@type" : "ContactPoint",
"availableLanguage" : [ "English", "Norwegian" ],
"contactType" : "sales",
"url" : "https://www.craftsmensoftware.com/contact-us"
},
"description" : "Craftsmen is an AI-native software engineering partner. We build dedicated engineering teams for companies in Europe and the US, and have worked with media and broadcast technology companies since 2011.",
"founder" : {
"@type" : "Person",
"jobTitle" : "Founder & CEO",
"name" : "Mahmudul Haque Azad"
},
"knowsAbout" : [ "Software team extension", "Dedicated software engineering teams", "Media and broadcast software", "Live streaming engineering", "Cloud-native engineering on AWS", "Legacy software modernisation" ],
"legalName" : "Craftsmen Ltd.",
"location" : [ {
"@type" : "Place",
"address" : {
"@type" : "PostalAddress",
"addressCountry" : "GB",
"addressLocality" : "Leeds",
"addressRegion" : "West Yorkshire",
"postalCode" : "LS1 4AG",
"streetAddress" : "One Sovereign Quay, Bridge End"
},
"name" : "Craftsmen UK (headquarters)"
}, {
"@type" : "Place",
"address" : {
"@type" : "PostalAddress",
"addressCountry" : "NO",
"addressLocality" : "Bergen",
"postalCode" : "5017",
"streetAddress" : "Kong Oscars gate 66, 68"
},
"name" : "Craftsmen Norway"
}, {
"@type" : "Place",
"address" : {
"@type" : "PostalAddress",
"addressCountry" : "FR",
"addressLocality" : "Boulogne-Billancourt",
"postalCode" : "92100",
"streetAddress" : "6 Avenue Pierre Grenier"
},
"name" : "Craftsmen France"
}, {
"@type" : "Place",
"address" : {
"@type" : "PostalAddress",
"addressCountry" : "BD",
"addressLocality" : "Dhaka",
"postalCode" : "1206",
"streetAddress" : "Plot # 316, Lane # 4, DOHS Baridhara"
},
"name" : "Craftsmen Bangladesh (operational hub)"
} ],
"logo" : "https://www.craftsmensoftware.com/hubfs/Craftsmen%20Logo_Black.png",
"name" : "Craftsmen",
"sameAs" : [ "https://www.linkedin.com/company/craftsmensoftware/", "https://www.facebook.com/craftsmenltd", "https://www.youtube.com/@craftsmensoftware" ],
"url" : "https://www.craftsmensoftware.com/"
}
```
```json
{
"@context" : "https://schema.org",
"@id" : "https://www.craftsmensoftware.com/#website",
"@type" : "WebSite",
"inLanguage" : [ "en", "nb" ],
"name" : "Craftsmen",
"publisher" : {
"@id" : "https://www.craftsmensoftware.com/#organization"
},
"url" : "https://www.craftsmensoftware.com/"
}
```